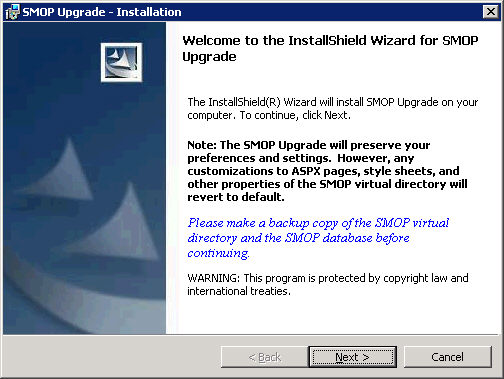
The SMOP Upgrade will perform the following:
If changes have been made to style sheets, logos, images and anything else in the SMOP virtual directory, these will be overwritten. It is recommended that the SMOP virtual directory be backed up before proceeding so that these changes are not lost.
Log into the server console where SMOP is installed. You can log into the console directly or use a terminal services session to run the SMOP Upgrade.
Note: You must log in using an account that has local administrator privileges.
Start SMOP Upgrade setup by invoking setup.exe from the directory where you have downloaded and extracted the SMOP setup files. By default, this is c:\smop_setup\setup.exe.
Existing SMOP Customers:
Please note that any customizations you have done may be lost.
Click Next to continue.
The SMOP license agreement will be displayed.
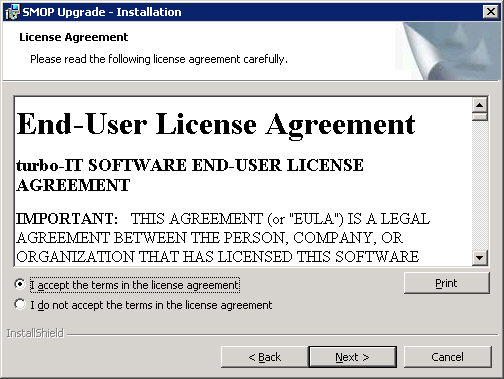
Please read through the license agreement, select the "I Accept" radio button, and click Next to continue.
You will see the SMOP System Requirements screen.
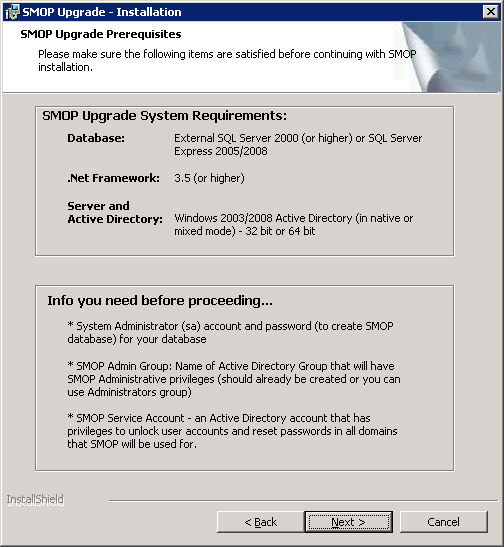
There are some changes in the SMOP requirements as follows:
Please read this information carefully, prepare the needed information, and click Next to continue.
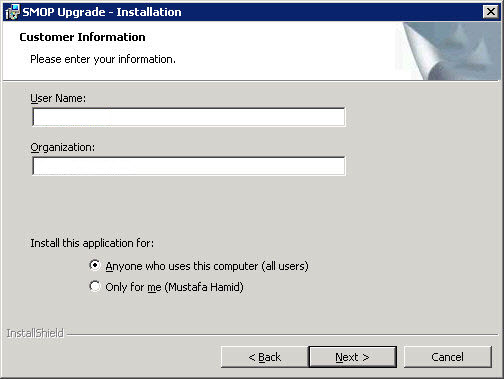
Please enter in your company information and click Next to proceed.
Please select the destination folder for the SMOP program files. SMOP installs only a few files here, the majority of SMOP files will be located in the virtual directory for the SMOP web site. This folder is where the SMOP error log file (smop.log) will be located.

Select the destination directory and click Next to Continue.
The SMOP upgrade will copy new files to this directory. Please ensure the correct root path of the SMOP directory. By default this will be the wwwroot directory as shown.
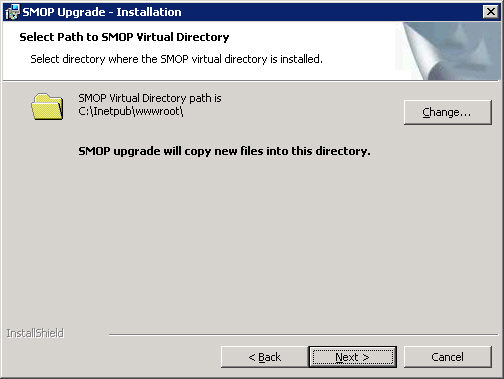
Select the destination directory for the virtual directory and click Next to Continue.
Select what type of database you use for the SMOP database. See Selecting SMOP SQL Server type for more information.

Select one of the radio buttons corresponding to your type of SQL Database and click Next to Continue.
Depending on which database you are using, setup will ask for database specific parameters. See the appropriate section below:

sa Password: The sa (System Administrator) password. The sa account is used to upgrade the SMOP database and the db_smop user. After setup, all database operations use the db_smop SQL login.
db_smop Password: This is the password for the db_smop account.
SQL 2005/2008 Express Instance Name: The instance name of the SQL Server 2005/2008 Express Edition installation. You should be able to get this from the database configuration screen in your SMOP installation.
Port: The TCP/IP port number that this instance of SQL Server 2005 Express Edition is using. You should be able to get this from the database configuration screen in your SMOP installation.
Fill in the required parameters and click Next to Continue.
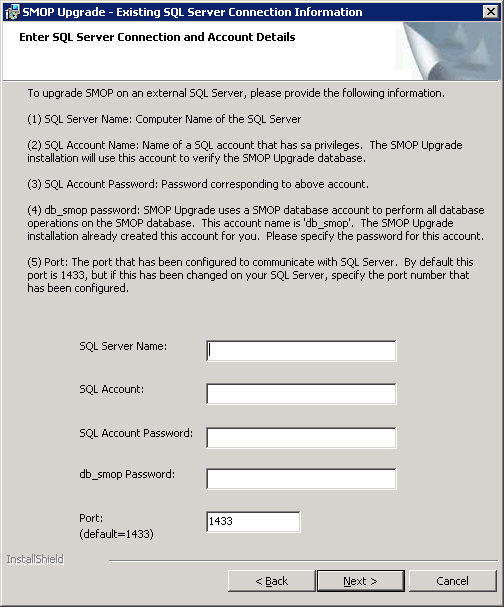
SQL Server Name: Server name of the SQL Server that you use for SMOP.
SQL Account: A SQL account that has System Administrative privileges. Usually, this is 'sa'.
Password: The password that corresponds to the SQL Account that has System Administrator privileges.
Port: The TCP/IP port number that SQL Server is configured to use. The default is 1433. You can get this from the database configuration section of the SMOP administrator pages.
Fill in the required parameters and click Next to Continue.
When you click Next, the SMOP setup will try and verify that the SQL Server connection parameters are correct. If a connection is made to the SQL Server you specified using the given parameters, SMOP setup will proceed to the next screen. If there is an error, the setup will prompt you to correct the information and try again.
Please specify the SMOP Administrative Group. See SMOP Administrative Group for more details.
This is a critical step that is difficult to correct later. If you specify an incorrect group name here or mistype the name, you will be locked out of the SMOP Administration pages, and you will not be able to correct this!! Please carefully enter the SMOP Administrative Group name and make sure the account that you will be using is a member of this group.

Type in the correct SMOP Administration Group name and click Next to Continue.
SMOP Upgrade has now collected all the needed information and will install when you click the Install button. It is recommended that you close all other programs and let SMOP installation finish before continuing with other work on this server.
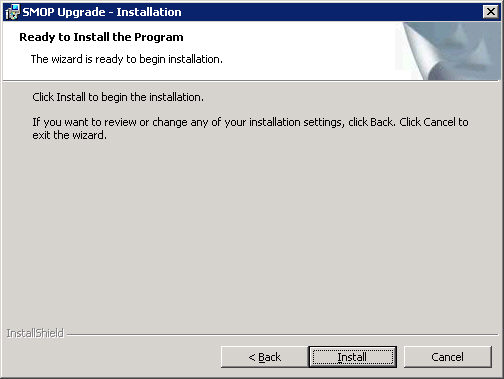
Click Install to proceed with the SMOP installation.
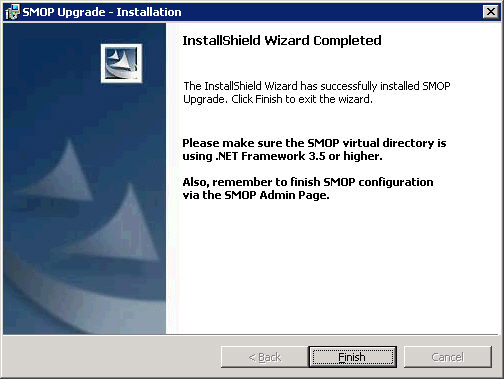
A final window is displayed when SMOP Upgrade is finished. It will remind you that some SMOP configuration items are still pending and needs to be finished by accessing the SMOP Administrator URL.
Two common configuration issues for SMOP are the .NET Framework and the application pool. Please verify correct settings in IIS6 or IIS7 as shown.
SMOP requires .NET Framework 3.5 or higher. Please ensure that the SMOP virtual directory is pointed to the correct .NET Framework version.
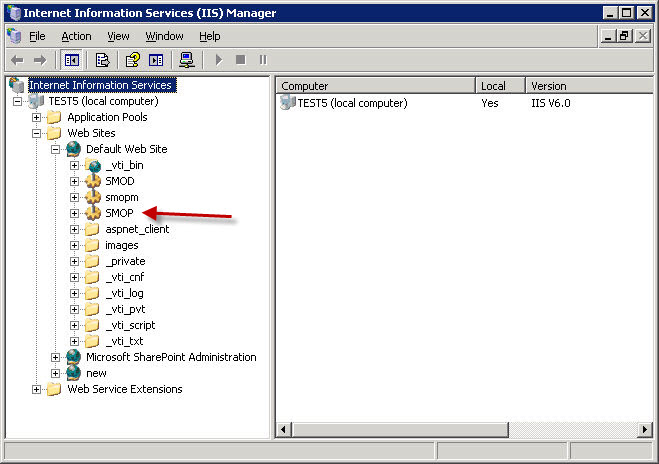
In IIS6, go to IIS manager, select the SMOP virtual directory, and click on Properties
Click the ASP.NET tab.
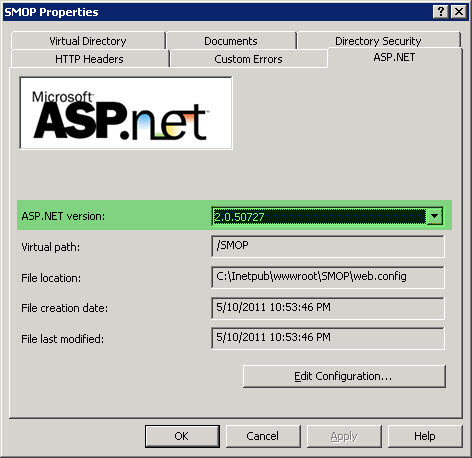
The ASP.NET should point to version 2.0 (which is the version that shows for .NET Framework 3.5) or version 4.0.
SMOP will not work if the ASP.NET is pointed to 1.1.
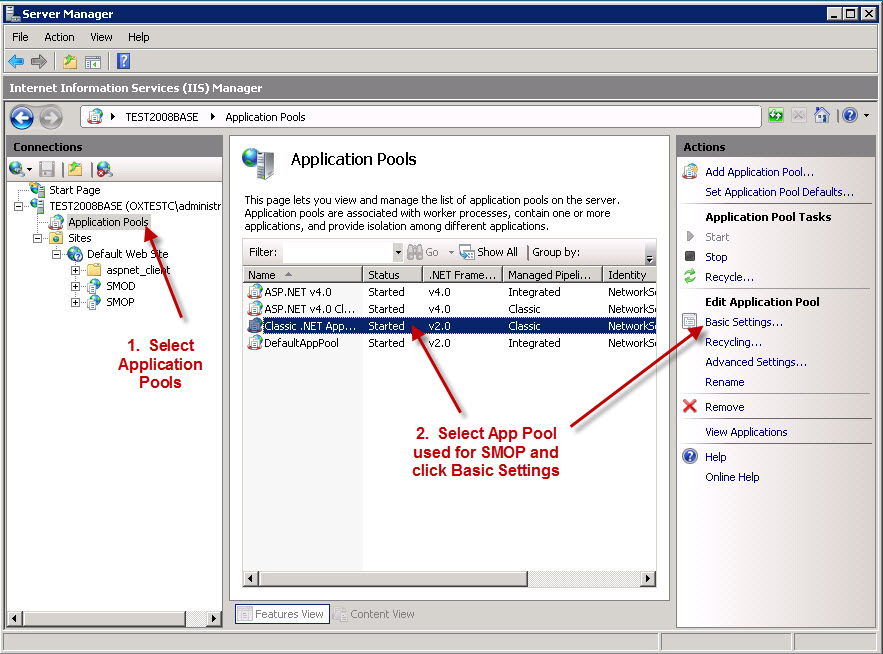
For SMOP to function correctly in IIS7, the application pool that is being used for the SMOP application should be in CLASSIC mode and be configured for .NET Framework 3.5 or higher.
In IIS Manager, click on the SMOP application in the left hand pane and then click on Basic Settings in the right pane as shown below.
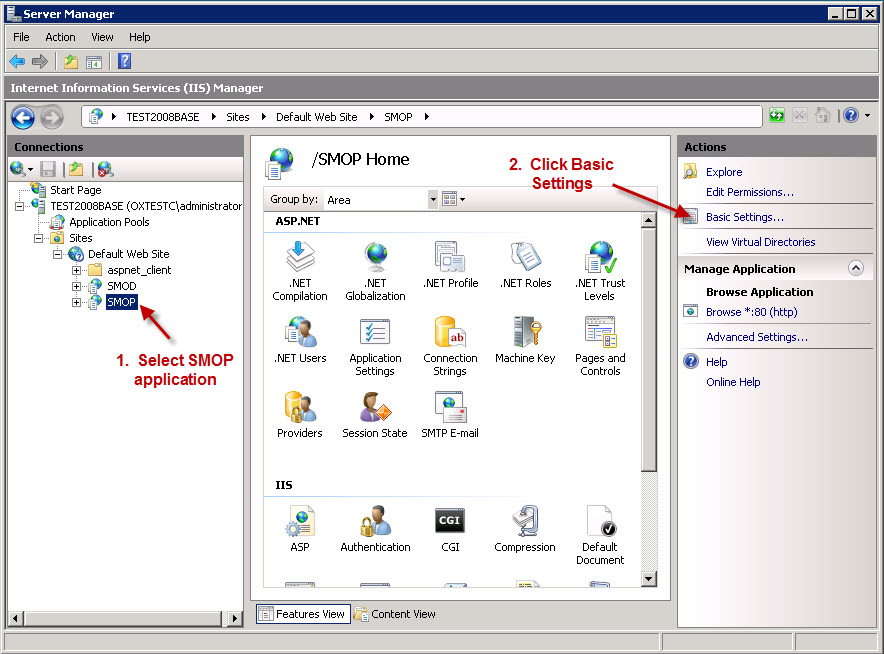
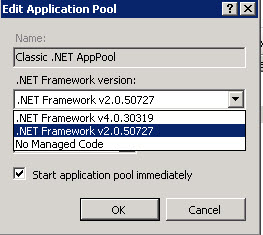
Ensure that the App Pool selected for SMOP is one of the CLASSIC Application pools. Select appropriate Application Pool and click OK to return to IIS Manager.
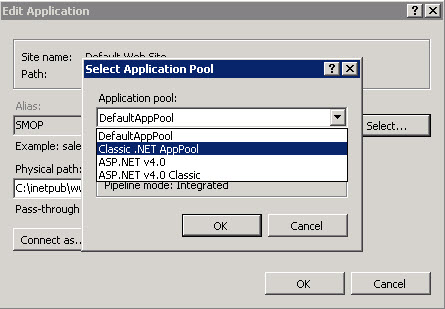
Click on the Application Pool button in left pane and then select the Application Pool that was selected for the SMOP Application.
Ensure that a supported .NET Framework version is selected (either 2.0 to use 3.5 or 4.0)
Close out and do an IIS Reset to restart IIS services.
After the upgrade process, you should verify functionality by going through the SMOP administrator pages and the user pages and performing some test enrollments, resets, and password changes.